Showing posts with label food photography. Show all posts

12 February 2014

Cilantro Lime Chicken Salad

Back in October I was really excited about food photography. I can't remember where it came from exactly but I couldn't get enough. I had so much fun sharing some of our favorite family recipes while learning how to use light, props, and my camera to make tasty looking images.

And then I got pregnant (yay!), but then I got morning sickness (boo!). Suddenly just thinking about eating food, let alone making and styling food, make me physically sick.

Thankfully morning sickness was just a phase and now we are on to happier (and tastier) times in the second trimester. Bring on the food.


I told Joseph recently that I would eat this for lunch everyday if I could. And from a girl who has always had a mild aversion to chicken salad sandwiches, you know this has to be something special.

I love to eat this all summer for dinner when my oven is forbidden to turn on. And during the winter when I need a break from soups and casseroles. And always, I would eat this always.

PS: These pictures can't do it justice. Chicken salad should be added to the list of most difficult foods to photograph.

Cilantro Lime Chicken Salad

2 cups shredded or chopped chicken (I've also used canned salmon)
1/2 cup halved grapes, green or red
1/2 cup chopped celery
1/4 cup snipped cilantro
1/4 cup thinly sliced green onions
2 limes
1/2 cup mayonnaise
1/4 teaspoon salt

Directions- 
1. In a medium bowl combine chicken, grapes, celery, cilantro and green onions. Zest the limes straight into the bowl. Add the juice from 1 1/2 limes into the bowl. 

(Save the other half of the lime in case you need more lime flavor in the end.)


2. Make the dressing by combining the mayonnaise and salt in a small bowl, mix together until smooth. Start by adding half the dressing to the salad. Stir until combined. 

Add more dressing, if needed, until everything is moistened and well mixed. ( I almost always end up with leftover dressing, I just don't care for mayonnaise that much.)


3. Cover and chill for at least an hour. Taste and add more lime juice if necessary. Serve on bread to make a sandwich. 

(We always toast our bread before making a sandwich. This prevents the bread from getting soggy.)

12 November 2013

Pot Pie Dough


I love taking shortcuts in the kitchen. If it can be prepared with fewer than five dishes, be ready in 20 minutes, or just thrown in the slow cooker, then I am a happy gal.

But I also have dearly loved recipes where I refuse to compromise.Would Grandma's Chicken Pot Pie work with store bought refrigerated dough? Why certainly! But if you are spending the time to make a pot pie, you might as well make an easy dough that will bake into the golden, flaky crust of your dreams.

This recipe might look intimidating, but I promise that making the dough is easy! Rolling out the dough and making it into a pot pie can be the tricky part. (Steps 1-5 cover the making of the dough, steps 6-12 cover the process of making the dough into a pot pie.)

Chicken Pot Pie Dough
Yield: Crust for 2 quart pot pie 
Nutritional Information

2 cups flour
2 teaspoons baking powder
1 teaspoon salt
2/3 cup shortening
1/2 cup hot (almost boiling) water
1 tablespoon lemon juice
1 egg yolk, not beaten

Directions-
1. Sift flour, baking powder, and salt together in a large bowl.

2. Pour 1/2 cup water into a small microwave-safe bowl, and heat in the microwave until almost boiling. Slowly stir shortening into hot water until melted and smooth.

3. Stir shortening into flour mixture in large bowl. Mix until evenly moistened. (PS: I'm sorry if you are one of those people who hates the word "mo*st", I just couldn't describe it in any other way!)

4. Add lemon juice and egg yolk. Stir until well combined.


5. Cover dough and chill for at least 30 minutes. The longer it chills the less sticky and less frustrating the dough will be.

6. Divide dough equally into fourths. On floured wax paper, roll out three parts for the bottom of a 2-quart dish, reserving one part for the top. Have your baking dish on hand to measure your dough. You will need between 2-3 inches extra on all sides, depending on your dish.


7. When you are done rolling out the bottom, slide your hand under the wax paper and gently flip the dough into the baking dish. Make sure the dough reaches all sides and gently peel off the wax paper. With a knife, trim off any dough that hangs over more than 1-inch.


8. Fill with your desired pot pie recipe. I recommend my Grandma's recipe (of course!) that will come later next week.

9. On floured wax paper, roll out remaining dough for the top of the pot pie. As before, flip and place gently over the filled pie, making sure the dough reaches all four sides.


10. Dip your first two fingers in a cup of warm water and slide between the two pieces of dough along the edge. Press the dough gently along the edge to seal it. Carefully work your way around the whole pie.


11. Using a knife, cut off the extra dough hanging over the baking dish, leaving no more than an inch. Roll the sealed dough towards the pot pie and tuck under, forming the crust.


12. Cut four vents in the top. Bake at 425°F for 25-30 minutes or until crust is golden brown and the gravy bubbles up through the vents.


 I love love this recipe and it is always my go to when taking a meal to a new mom or someone else in need. Although I love taking shortcuts in the kitchen, this is one recipe that makes me proud to say, "I make my own chicken pot pie with homemade crust and I promise it is better than Miss Calendar's!" 


01 November 2013

Intro to Food Photography

In case you hadn't noticed, I have been photographing a lot of food lately. One of my favorite things I have learned in the past month is how to make a mini studio with a seamless background in my kitchen with things I have on hand.

One of my new favorite places for food photography inspiration and tutorials is the food section of fstoppers.com. In this tutorial for a seamless background system, Taylor made it so easy and accessible even for growing food photographers like myself. He uses white foam board, clamps, white poster board and tape. I simplified it even more by using a sturdy cardboard box (diapers!) to tape my white poster board.

Here is my set up: 

I have my mini studio set up at about a 45 degree angle from the natural light streaming in through the window. My tripod is set up also at 45 degrees from the light, this shows where my camera will be for the shot.
 

Opposite angle of the same set up, still at 45 degrees from the light. You can see at the top of the box where I have duct taped my white poster board to hold it in place. You will adjust the height of the poster board depending on the height of your subject. It just takes experimentation.

Wide angle view of where my camera is set up. You will notice that instead of one sheet of poster board I have two. (Meaning the seamless background really isn't seamless! Shhh!)

This is my resulting photograph. If you look closely you can see the where one poster ends and another begins. This could be easily remedied by taping the first poster board to a lower position on the box (making it longer and removing the need for a second sheet), fixing it in Photoshop, or simply buying a larger piece of poster board.


Next I wanted to fill in the shadows of the strawberries by bouncing white light from the opposite side of the window. I used a large piece of white cardboard just out of the view of the photograph.

Interested in learning more about food photography? 

It's the beginning of another month and the perfect time to start 30 Days to Better Food Photography, Day 1. (I won't admit what day I'm on and how long it took me to get there...)

One of my favorite food photographers is Helen Dujardin. I love looking at her fresh and clean work. She truly makes food look like art! While you are waiting for her book, Plate to Pixel, from the library or Amazon check out this tip-filled interview.

21 October 2013

Pumpkin Banana Bread

I am all about pumpkin recipes but I can only handle so much pumpkin-y stuff before I plead, "Please Pinterest, it is time to move on." 

But when I learned that pumpkin puree can be substituted for eggs in baked goods, I felt the clouds part and heard angels from on high. I have already tried (and loved) the substitution in this recipe and also Slice of Pumpkin Slice Cookies

Now I'm thinking about those long nine months when I was pregnant and suffered (okay not really) by forgoing tastes of cookie dough with raw eggs. Next time I will be prepared!


By just substituting pumpkin for the eggs in this banana bread recipe, you get a rich golden color with a slightly crunchy (and not soggy) crust. It doesn't shout pumpkin bread like most do, but the mix of subtle pumpkin flavor with the cinnamon chips is perfect. Oh so perfect!

 
Pumpkin Banana Bread
Nutritional Information

1 cup sugar
1/2 cup butter
1/2 cup pumpkin puree
3 very ripe bananas, mashed
1/4 teaspoon salt
1 teaspoon baking soda
1 tablespoon warm water
2 cups flour
1 cup mini cinnamon baking chips

Directions-
1. In a large bowl, cream together the sugar and butter. Add in pumpkin puree and mashed bananas and mix well.
2. In a small cup, stir to dissolve baking soda in warm water and add to the pumpkin mixture. Next, mix in the salt and flour. Stir in the cinnamon chips.
3. Divide batter between two greased and floured loaf pans.
4. In a 325°F preheated oven, bake for 40-50 minutes or until golden brown. Cool on a wire rack.


Notes-
- For a more pumpkin-y flavor, add your favorite blend of pumpkin spices when you mix in the flour.
- My husband informed me that he doesn't like any banana bread. And then he proceeded to sneak slices all day. So yeah, it is really good.

18 October 2013

Sweet and Spicy Sesame Noodles


Growing up I thought that leftovers were those cold things that sat in the fridge until Dad had them for lunch. Fast forward a few years, I'm married and now when I cook for our family of three it usually makes leftovers. And because Dad isn't here to eat them, I have faced my fears and come to realize that leftovers can be wonderful wonderful things.

Like this recipe! It is delightful as leftovers and it uses the leftover bits from other recipes (Slow Cooker Jerk Chicken and Roasted Vegetables and Pineapple) in a new and delicious way!

Sweet and Spicy Sesame Noodles
Nutritional Information 

1 pound spaghetti noodles
1/2 cup chicken stock
1 teaspoon ground ginger
1 garlic clove, grated
3 tablespoons peanut butter (we prefer chunky)
1/4 cup soy sauce
hot sauce, a couple of dashes
2 tablespoons canola oil
2 tablespoons honey
2 cups shredded chicken (recommend Slow Cooker Jerk Chicken)
2 cups roasted vegetables and pineapple
2 cups shredded cabbage
4 scallions, thinly sliced 
3 tablespoons toasted sesame seeds, optional

Directions-
1. Place a large pot of water over high heat and bring to a boil. Once the water is boiling, add a generous amount of salt, then pasta, and cook al dente.
2. While the pasta is cooking, heat the chicken stock in a small saucepan. Once warm, add the ginger, garlic, peanut butter, soy sauce, hot sauce, canola oil, and honey. Whisk over heat until combined. Remove from heat.
3.  Assemble dish by layering pasta, shredded chicken, roasted vegetables and pineapple, shredded cabbage, scallions, and sesame seeds. Top with warm sweet and spicy sauce.


Notes-
-This makes more than my family can eat in one meal and so we keep each part separate as we assemble our plates. (This makes leftovers easier when the sauce doesn't make everything soggy.) However, you can mix everything together in a large bowl and serve as well.
-Substitute vegetable for chicken stock and leave out the shredded chicken for a vegetarian option.

15 October 2013

Roasted Vegetables and Pineapple


Funny how some of my favorite recipes are so easy they can hardly be considered a recipe. This one included. I love roasting a pan of vegetables with pineapple to eat with our favorite Slow Cooker Jerk Chicken or over brown rice.   

Roasted Vegetables and Pineapple
Nutrition Information

1 red onion, sliced
1 green bell pepper, seeded and sliced
1 red bell pepper, seeded and sliced
1 pineapple, peeled, cored and chopped into bite-sized pieces
1-2 tablespoons olive oil
salt and pepper

Directions-
Preheat oven to 400°F.

Spread sliced vegetables and pineapple onto a rimmed baking sheet and drizzle with olive oil. Season with salt and pepper.


Add baking sheet to the preheated oven and roast vegetables and pineapple for 30 minutes. 


Serve with Slow Cooker Jerk Chicken. And try not to steal too many chunks of sweet pineapple goodness before dinner!

08 October 2013

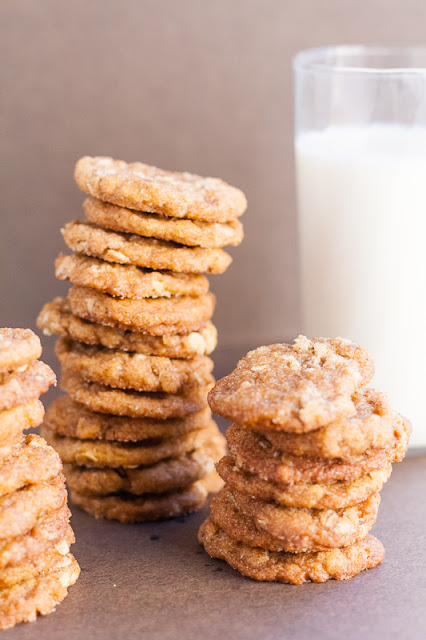
Slice of Pumpkin Spice Cookies


Are you looking for more recipes using pumpkin? 

What about an egg-less cookie dough that you don't have to worry about eating? 

STACKS of pumpkin spice chewy goodness?

Yep, I thought so.


Slice of Pumpkin Spice Cookies
Yield: 4 dozen small cookies 
or 2 dozen medium cookies
Nutrition Information

1 cup brown sugar
1/4 cup butter
1/4 cup shortening
1/4 cup pumpkin puree
1 teaspoon vanilla
1 1/2 cups flour
1/2 teaspoon cream of tarter
1/2 teaspoon cinnamon
1/8 teaspoon nutmeg
1/4 teaspoon salt
1/2 cup rolled oats 
1/4 cup sugar
2 teaspoons cinnamon

Directions- 
1. In a large bowl combine brown sugar, butter, shortening, pumpkin puree and vanilla. Beat at low speed, scraping bowl often, until well mixed (2 to 3 minutes). 


2. Add flour, cream of tartar, cinnamon, nutmeg, and salt. Beat at low speed, scraping bowl often, until well mixed (1 to 2 minutes). 


3. Add rolled oats to dough and stir with a spoon until well incorporated. 


4. Form dough into a ball and divide in half. On two sheets of plastic wrap, shape each half of the dough into a log (about 12 inches long). Wrap and chill dough 4 hours or overnight. 


5. Heat oven to 350F. In small bowl combine sugar and cinnamon. Slice cookies 1/4-inch thick; dip each side in sugar mixture. Place on ungreased cookie sheets about 1 1/2 inches apart.


6. Bake for 9 to 12 minutes or until golden brown. Remove from pans immediately to cooling racks. Let cool and place in an airtight container.


Notes-
-Go ahead and double this recipe! The dough keeps in the freezer, perfect for a last minute dessert or when you need a taste of cookie dough. Remember, no eggs, so taste away!
-My cookies were done at exactly 9 minutes. Resulting in cookies that were crispy on the outside and soft on the inside.
-If you want bigger cookies, slice cookies 1/2- inch thick and then flatten to 1/4- inch thickness. (I like them small because then I can eat and handful and not feel guilty about it. Oops!)


04 October 2013

Slow Cooker Jerk Chicken

**Disclaimer, there is a picture of a raw chicken in today's post. If you get woozy or easily offended, I suggest you avert your eyes.**

But seriously, if I could hire someone to handle and clean up after all the raw chicken at my house, I would without hesitation.

Last month when whole chickens were on sale, I grabbed two and stuck them in my freezer. I knew I was going to have to touch them eventually (deep breath). And this week, it was time.

One of my favorite ways to deal with raw chicken is to slide it straight into the slow cooker to cook for the day, leaving my hands clean and my nerves calm. 

However when I adapted this recipe, a whole raw chicken must be touched, bathed, and slathered in a jerk spice paste. Deep breath, I promise it will be worth it!


Slow Cooker Jerk Chicken
Nutritional Information

1 whole chicken, 3-5 lbs
1 small red onion
2 cloves garlic, chopped
2 green onions, chopped 
1/4 cup orange juice
4 teaspoons red wine vinegar
juice of 1 lime
1 1/2 teaspoons sweet paprika
1 1/2 teaspoons ground cumin
1 teaspoon ground allspice
1/2 teaspoon cinnamon
1/4 cup olive oil 

Directions-
1. Begin by making four balls of aluminum foil and placing them in the bottom of your slow cooker. For each ball I tore off about 14 inches of foil and lightly packed it into a ball, kind of like I was making a snow ball. 

You want them to be large enough to keep air circulating under the chicken but small enough that your chicken will fit in the slow cooker with the lid on.


2. Now grab your whole chicken and remove everything from the inside cavity. (If you are like me, it is best to not ask what it is, just grab it and toss it in the garbage.) Rinse the chicken in the sink, inside and out, with cold water. 

As you rinse, work your hands around the chicken between the breast meat and the skin. Let the chicken rest in a pan in the sink while you make the paste.

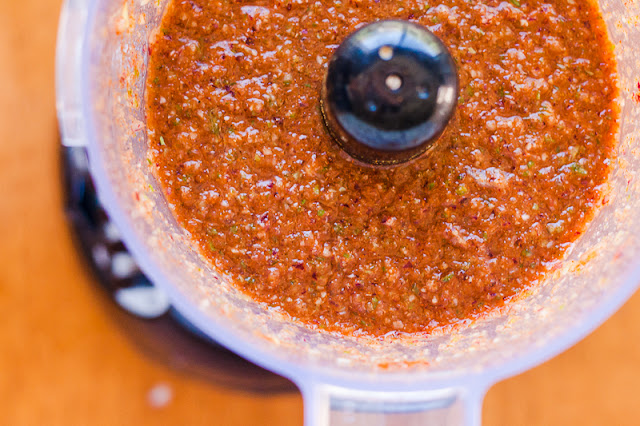
3. Place all the ingredients listed above, except olive oil, in a food processor and pulse to combine.


4. With the food processor running, stream in the olive oil to form a thick paste.


5. Go back to your chicken and pat dry, inside and out, with paper towels. Place chicken, breast up, in the slow cooker on the balls of aluminum foil. Now spoon and rub the jerk paste onto and under the skin of the chicken.

 **I know this looks gross, or dross as my little guy would say, but the paste smells amazing and this chicken will not disappoint!**


6. Cover chicken, breast meat under the vent whole in the lid, and cook on low for 6-8 hours. This chicken can be dry if cooked for too long, so at 6 hours insert a meat thermometer through the vent on the lid into the breast meat to check the temperature. 

As soon as the thickest part of the breast reaches 160 degrees, turn off the slow cooker and let the chicken rest for a few minutes.


7. The meat will be so tender that it will be difficult to remove in one piece. I've found that if I get two large spoons or spatulas, I can slide them under the chicken and lift it out in mostly one piece. No guarantees!

8. Congratulations! You conquered a whole raw chicken and now you have a golden juicy cooked chicken to show for it. 

Enjoy the drumsticks or sliced breasts with brown rice, a side salad, or roasted vegetables and pineapple. Shred the leftover breast to use in chicken salad, stir fry, or sweet and spicy sesame noodles.


Even the little guy loves this recipe and tries to sneak tastes whenever he can!


Related Posts Plugin for WordPress, Blogger...